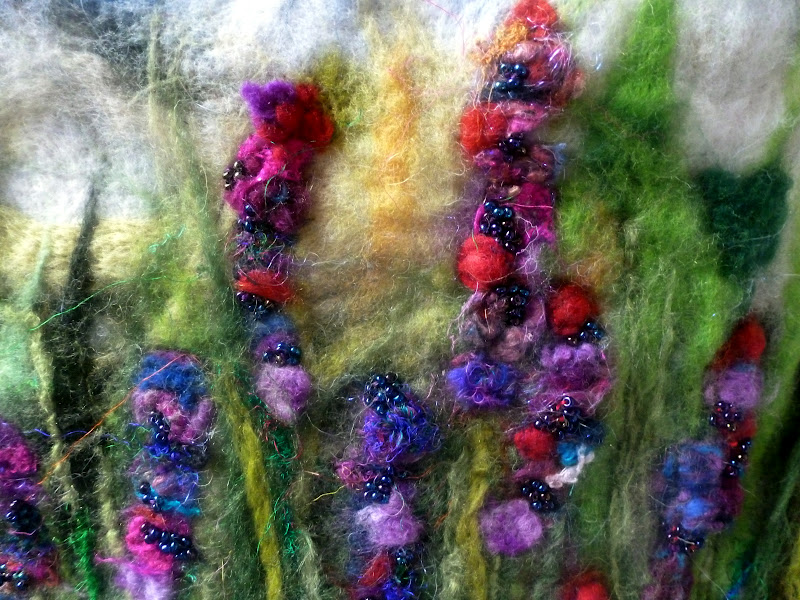
This weekend I went to my boyfriends parents house, I had an absolutely lovely weekend! Whilst I was there, it was his mum's and sisters birthdays, so my boyfriend's aunt brought round some awesome boob themed birthday cakes! I also did lots of playing with their adorable dog Eric, enjoyed some loves tequila beer and admired his mums fantastic arty work!
Sunday, 26 January 2014
Wednesday, 22 January 2014
Tie dye madness
After watching Kirstie Allsopps home-made Christmas a few weeks ago, I have been obsessed with two things, pom poms and tie dye! So the hunt began for some 100% cotton clothes and dye.
I decided that my first tie dye experience had to be gaudy and garish, I bough bright pink dye and a violet! I bought some white undies and socks from Morrisons, a top from Uniclo and I found and old white beach shirt in the cupboard that I could dye.
How to tie dye-
-First things first prepare you items of clothing, with a ton of elastic bands we tied each items of clothing in different ways, twisting, knotting and swirling. In hindsight though, we tied the socks together in pairs, which was a mistake, it caused the area in the middle, where the socks were touching each other to not pick up the dye very well, leaving them a very light shade of purple instead of the dark purple we had ont he outside of the sock.
- Next we prepared the dye, first dissolving the dye in some water with salt then adding more warm water and stirring continuously for 15 minutes. However more detailed instructions would be on individual packets of dye!
-Then dye your clothes! Pop in your banded up socks, pants and tops and submerge them in the dye and stir every few minutes. One of the tops I wanted to dip dye, so I tied the t-shirt to a bit of string and hung it off the kitchen tap! Leave your clothes in the dye for an hour.
-Finally, rinse your items of clothing, remove the elastic bands and put them in a spin cycle in the washing machine. Once done hang out to dry!
I only have one photo of the final dyed pieces, some of the purple socks! I will put some more photos up of the rest of the clothes soon! they all looked fabulous!
I decided that my first tie dye experience had to be gaudy and garish, I bough bright pink dye and a violet! I bought some white undies and socks from Morrisons, a top from Uniclo and I found and old white beach shirt in the cupboard that I could dye.
How to tie dye-
-First things first prepare you items of clothing, with a ton of elastic bands we tied each items of clothing in different ways, twisting, knotting and swirling. In hindsight though, we tied the socks together in pairs, which was a mistake, it caused the area in the middle, where the socks were touching each other to not pick up the dye very well, leaving them a very light shade of purple instead of the dark purple we had ont he outside of the sock.
- Next we prepared the dye, first dissolving the dye in some water with salt then adding more warm water and stirring continuously for 15 minutes. However more detailed instructions would be on individual packets of dye!
-Then dye your clothes! Pop in your banded up socks, pants and tops and submerge them in the dye and stir every few minutes. One of the tops I wanted to dip dye, so I tied the t-shirt to a bit of string and hung it off the kitchen tap! Leave your clothes in the dye for an hour.
-Finally, rinse your items of clothing, remove the elastic bands and put them in a spin cycle in the washing machine. Once done hang out to dry!
I only have one photo of the final dyed pieces, some of the purple socks! I will put some more photos up of the rest of the clothes soon! they all looked fabulous!
2014 A New Year, a newish me
2013 was mad, I took my finals, graduated, moved to a flat in London, got a fantastic boyfriend and got a graduate job. It was busy, fun, exciting and hugely stressful. I was really hoping 2014 would get off to a more relaxed start, but unfortunately no.
For the last few weeks, shortly after I started my new job I have been feeling hugely overwhelmed and frankly quite depressed, the approach of Christmas and a holiday was one of the only things making sure I held it together. The New Year however has come with a big kick to the knees and I once again am feeling like utter poop.
So I have decided that I won't let it, no more tears, no more getting overly stressed and no more over thinking everything! I have already started trying to get my life back in order, I changed my birth control tablets, as the ones I was taking; Rigevidon a combination pill, were sending me absolutely crazy, and even though I don't particularly like my job, I am going to try and make it more of a positive aspect of my life. This blog is also going to be a new step in making positive changes in my life, with a new blog post to be written at least once a week!
So here goes, lets get out of this pit I have fallen into and start to feel the sunshine again.
Wednesday, 13 February 2013
No Water Nail Marbling
Valentines day is tomorrow and I decided I wanted some pretty nails for the occasion thought of a few different things to do, but finally decided on some pink nail marbling! However the whole water nail marbling look like a real faf! So I came up with my own technique!
All you need for this is a few different colour nail polishes and an old Biro!
Then splodge a drops of each colour on your nail. Using the biro swirl the nail polish around on the nail, so that the whole nail is covered!
This is how it looked once I had done this for each nail, needed a bit of neatening up!
Finally I put a bit of glitter top coat on top! They still need neatening up however round the edges!
Even though you can't see the marbling effect clearly in the last picture it is there! Overall I was really happy with the results and it was super easy! So you should all give it a go!
Labels:
beautiful,
cute,
fashion,
marbling,
nail marbling,
nailart,
nails,
pretty,
valentine,
valentines
Sunday, 13 January 2013
Awesome New Blog... The Wonderful Wild
I think people should go check out the awesome new blog The Wonderful Wild! If you like cute animals, weird nature and cool places, this new blog is for you!
The Most recent post was about The Quokka!
Sunday, 26 August 2012
Henna Update
So a few months ago I hennaed my hair, at first I was that keen on the results as it was so much darker than my natural hair. However a few month down the line the colour has faded considerably and now I love it!
Saturday, 25 August 2012
A Very British Birthday Cake
Hello again! It was my mums birthday on Saturday and she had
asked for a union jack cake! At first I was a bit like ‘Huh!’ as I did not
really know how to go about it. At first I thought about using food colouring
on royal icing to get the red white and blue and just cutting out the icing to
form the flag. However my family are not big fans of overly sweet things so
instead I decided to use fruit to make the union jack (since all the fruit I
used were in season it was especially summery as well!) ! I also blended
raspberries into whipped cream for the filling as I thought this would be less
sweet than butter icing (It is bloody delicious!).
Ingredients
- 175g butter
- 175g caster sugar
- 3 eggs
- 1tsp vanilla extract
- 1tsp baking soda
- 175g self raising flour
Filling/topping
- Tub of whipping/double cream
- 2 punnets of raspberries
- 1 punnet of strawberries
- 1punnet of blueberries
- First blend together sugar and butter.
- Then add the eggs and vanilla extract.
- Blend for 2 minutes until the mixture forms bubbles on the surface.
- Then sift in the flour and baking soda and fold in with a metal spoon.
- Then separate between 2 cake tins and cook at 180 for 25 mins.
- whip the cream till it has thickened then add a punnet of raspberries and blend in.
- spread the cream between the layers of the cake and on the top
- Then using the different berries decorate the top (I attempted to do a union jack!)
- I then used a little pack of decorations from waitrose to decorate the cake further!
- Enjoy!
Friday, 29 June 2012
DIY- Makeup brush Jars
I have a growing collection of makeup brushes, the problem is that I can never find them in my makeup draw/bag and they get mucky in with all my other makeup. So I decided I wanted to find some nice pots or jars to put them in. The only problem was I could not find any that I liked that weren't really expensive. So instead I bought some cheapy jars, that you can get hold of pretty easily and accessorized them up, to make them look cute!
Before!
After!
So all I did was use some ribbon (my mum has loads of it, she is a constant crafter!) and tied it into a big bow, and then I used some little paper flowers and twisted them into the bows! It was very easy and cheap, yet I think it has made the jars look very pretty and they are just so practical!
Hair Henna
Last Friday, I did something rather drastic. I hennaed my hair! I have never dyed my hair before, so this was a big step for me. Last Christmas I had an appointment booked to get my hair dyed and I chickened out and cancelled it, so finally I have done it!
Problem was that I did it myself (never a good idea), I did no research on henna.I was told (by unreliable resources) that it would wash out very quickly and that it would not change the colour of my hair that much, well that was wrong!! Turns out the dye is permanent and cannot be dyed over as it is oil based.It also can make your hair go very orange, which is what happened to mine.
The packet suggested to leave the henna on for 30 mins to 2 hours, I left mine in for 30 mins, my hairdresser told me this is where I went wrong. My hair was at first bright highlighter orange! Thankfully it has faded to a nicer coppery/auburn colour which I now actually really like!
Problem was that I did it myself (never a good idea), I did no research on henna.I was told (by unreliable resources) that it would wash out very quickly and that it would not change the colour of my hair that much, well that was wrong!! Turns out the dye is permanent and cannot be dyed over as it is oil based.It also can make your hair go very orange, which is what happened to mine.
The packet suggested to leave the henna on for 30 mins to 2 hours, I left mine in for 30 mins, my hairdresser told me this is where I went wrong. My hair was at first bright highlighter orange! Thankfully it has faded to a nicer coppery/auburn colour which I now actually really like!
Before
After!
I look really different in both these pictures, (the top one is just before a night out, and the second was taken today after a day of shopping) but the hairstyle is the same so I thought it would be a good comparison! So what do you think? I actually now really love it!
Monday, 25 June 2012
Hello all!
I have not blogged since before my field trip to Malham Tarn two weeks ago! A lot of things have happened since then, well not that many but it does feel like I have been busy. Malham was, despite my reservations, fantastic! It was a very hectic week, I held a bat, rung some birds (this means putting a little identification ring around their ankles, not strangling them) and did a project on two species of warblers territorial sizes and habitat preference. I learnt how to identify different birds by their song and identify endless plants. The week included getting up at around 5AM everyday and endless walking, but none the less it was great fun and endlessly interesting!
Below are a few pictures from the trip!
Following the trip, my laptop had to go in for some repairs, 2 years of picking it up by the screen has meant that the screen has nearly come off oops!! So I was not able to blog about the trip till now! In this last week I have been on a cup cake course (blog post to follow) and done something slightly drastic to my hair! But a Post on that shall have to wait!
I have not blogged since before my field trip to Malham Tarn two weeks ago! A lot of things have happened since then, well not that many but it does feel like I have been busy. Malham was, despite my reservations, fantastic! It was a very hectic week, I held a bat, rung some birds (this means putting a little identification ring around their ankles, not strangling them) and did a project on two species of warblers territorial sizes and habitat preference. I learnt how to identify different birds by their song and identify endless plants. The week included getting up at around 5AM everyday and endless walking, but none the less it was great fun and endlessly interesting!
Below are a few pictures from the trip!
![]() |
| Baby great tit |
![]() | |||||||
| Pipistelle bat |
![]() |
| New born lambs (very late in the year for this) |
![]() |
| Great Spotted Woodpecker |
![]() |
| Malham Tarn itself |
Following the trip, my laptop had to go in for some repairs, 2 years of picking it up by the screen has meant that the screen has nearly come off oops!! So I was not able to blog about the trip till now! In this last week I have been on a cup cake course (blog post to follow) and done something slightly drastic to my hair! But a Post on that shall have to wait!
Tuesday, 5 June 2012
To Malham and beyond...
I have finished my exams! Yay! Finally I am on holiday! Ohhhh wait, no I am not. I still have a field trip to go on, I still have a lot of work to do, ohhh F**K! So on Friday I am off to Malham some tiny little place in north Yorkshire eugghh! A few fellow students and I am off for a week to a National park in the Yorkshire dales, we are going to help out with reserve monitoring and will be doing our own projects in small groups.
My group is looking at and comparing different species of Warbler territory sizes and habitat preferences. We have to be up at dawn and dusk to collect the necessary data, dawn at this time of year is at 4.45 AM, yes, that's right, I have to be up and out in a forest at 4.45AM! I am so not looking forward to next week!
When I get back form this trip I will most likely be absolutely exhausted! The last Field trip I wen on with my university, consisted of us waking up at 7 in the morning and not being able to go to bed before 3, as we had so much work! I am hoping and praying that this will not be the same in Malham!
Wish me luck and sleep!
My group is looking at and comparing different species of Warbler territory sizes and habitat preferences. We have to be up at dawn and dusk to collect the necessary data, dawn at this time of year is at 4.45 AM, yes, that's right, I have to be up and out in a forest at 4.45AM! I am so not looking forward to next week!
![]() |
| Here is a picture of a Warbler! |
Wish me luck and sleep!
Thursday, 31 May 2012
Shoes, shoes shoes!
A week or so ago I bought a cute black dress, as cute as it is, it's just a little but bland! So I wanted to but some beautiful new statement heels to go with it! At first I thought red, but then black and red is done so often that I wanted to find something a bit different. So I decided to try and find some electric blue shoes! And boy was I lucky....
I managed to find myself a pair of Kurt Geiger heels, that were £120 reduced to £39! They are perfect for my outfit and I could not believe the bargain! I love them, and they are actually really comfortable. I have always been a firm believer in buying more expensive shoes clothes etc, over very cheap brands, as in the long run, they are more comfortable and last way longer! I own quite a few Kurt Geiger shoes from sales, and they always wear really well!
Well I'm off now to totter around my house in my new shoes, preening in front of any mirror I come across haha!
I managed to find myself a pair of Kurt Geiger heels, that were £120 reduced to £39! They are perfect for my outfit and I could not believe the bargain! I love them, and they are actually really comfortable. I have always been a firm believer in buying more expensive shoes clothes etc, over very cheap brands, as in the long run, they are more comfortable and last way longer! I own quite a few Kurt Geiger shoes from sales, and they always wear really well!
Well I'm off now to totter around my house in my new shoes, preening in front of any mirror I come across haha!
Saturday, 26 May 2012
Crafting Mad!
If you, or anyone else you know, loves all things crafting, cooking, gardening or textiles, you really should check out this blog! She really covers a multitude of anything do it yourself, the woman behind Dawn the constant crafter is my wonderful mum and she is very talented! She also has a lot of pictures of a younger me on her blog!
http://dawnthecrafter.blogspot.co.uk/
Below are a few pictures of what she gets up too!
http://dawnthecrafter.blogspot.co.uk/
Below are a few pictures of what she gets up too!
Wednesday, 23 May 2012
French plait/braid go to hair
As I have mentioned in previous blog posts, it is exam time for me at university at the moment, (in fact I had an exam this morning) and that means I really can't be bothered to make that much of an effort, but I still like to look at least somewhat presentable (it's been inbuilt into me from a young age that you should always look reasonably smart when leaving the house).
So I have a few go to hairstyles that are quick easy and yet still look nice! My first go to hairstyle is to french plait the front parts of my hair back and down, i sometimes join them together at the back of my head, or just plait them down separately! I love this hairstyle as it is great if your hair a a bit frizzy and messy, if its a little bit greasy or if you have a fringe to get it out of your face!
The hairstyle is actually really simple, just gather hair from below the plait and from above the plait, and carry on doing this until you reach just before your ear, then just gather hair from above the plait. After a few cross overs like this, stop gathering hair and just plait down!
This hairstyle is also great it it is really hot and you want to keep your hair off your face. You could even gather your hair into a bun or ponytail at the back, sot hat you have a more interesting up do!
So I have a few go to hairstyles that are quick easy and yet still look nice! My first go to hairstyle is to french plait the front parts of my hair back and down, i sometimes join them together at the back of my head, or just plait them down separately! I love this hairstyle as it is great if your hair a a bit frizzy and messy, if its a little bit greasy or if you have a fringe to get it out of your face!
| Front view, pardon the lack of makeup |
| Side view |
This hairstyle is also great it it is really hot and you want to keep your hair off your face. You could even gather your hair into a bun or ponytail at the back, sot hat you have a more interesting up do!
Tuesday, 15 May 2012
Spring/Summer makeup!
Even though the weather in England has been pretty rubbish lately I still feel the need to have some amount of a spring/summer feeling in my life! One way I love to do this, is through my makeup!
Below are a few of my favorite looks at the moment!
1. The bright lip- this is probably one of my favorite of all the looks above! I just love bright lipstick! I think this is a great look if you don't want to wear a lot of makeup, but you still want to have a bit of a colour pop to your face!
2.Lilac Shadow- Lilac eyeshadow pretty much suits anyone, but you have to make sure that it looks young and fun, rather than granny! Keep the rest of your makeup paired down, or put with a bright red lip!
3.Fresh and Dewy- This is a great look if you don't like wearing a lot of makeup, it looks healthy and fresh, yet still polished.
4. Rosy Girl- my favorite look of the bunch, a nice rosy glow on the cheeks and lips, with a bit of subtle taupey shimmery shadow on the eyes! I love it, I think this makeup is perfect for almost any occasion, out for a walk, or out on the town!
I will be replicating all four of these different looks throughout the next few months as I love them all!
Tell me if there are any other good makeup looks that you like!
Below are a few of my favorite looks at the moment!
1. The bright lip- this is probably one of my favorite of all the looks above! I just love bright lipstick! I think this is a great look if you don't want to wear a lot of makeup, but you still want to have a bit of a colour pop to your face!
2.Lilac Shadow- Lilac eyeshadow pretty much suits anyone, but you have to make sure that it looks young and fun, rather than granny! Keep the rest of your makeup paired down, or put with a bright red lip!
3.Fresh and Dewy- This is a great look if you don't like wearing a lot of makeup, it looks healthy and fresh, yet still polished.
4. Rosy Girl- my favorite look of the bunch, a nice rosy glow on the cheeks and lips, with a bit of subtle taupey shimmery shadow on the eyes! I love it, I think this makeup is perfect for almost any occasion, out for a walk, or out on the town!
I will be replicating all four of these different looks throughout the next few months as I love them all!
Tell me if there are any other good makeup looks that you like!
Wednesday, 9 May 2012
Fishtail Plait/Braid
I love fishtail plaits! I think they are so pretty and very useful! So I
decided to make a small video on how to do a fishtail plait! Hope you
enjoy!
Friday, 4 May 2012
A Bun with a twist...
Last week one of my friends came into uni with really pretty hair, it was plaited and then put into a bun, I thought it looked really cool. So I decided I would try it out, and it was surprisingly easy. I think its a clever way of making a boring bun look more interesting and can be dressed up or down.
So here is a guide to create the plait bun...
1. First french plait your hair! Some people find this really hard (I know I used too) but it is actually really easy, just gather up bits of hair slowly, as you plait down the head.
2. Then coil the plait into a bun and pin it (this is easier if you have slightly thinner hair than mine!). This is actually the trickiest part for me, and as you can probably see below I have not pinned the bun all that well.
3. Finally voila! Below is a front shot of the hair style, and as you can see it just looks like a normal bun from the front! You can make any changes, mess the style up a bit to make it more casual, or perhaps add some chandelier earrings to dress it up! (Also I changed my top in this picture! I took this just as I was about to leave the house!)
So here is a guide to create the plait bun...
1. First french plait your hair! Some people find this really hard (I know I used too) but it is actually really easy, just gather up bits of hair slowly, as you plait down the head.
2. Then coil the plait into a bun and pin it (this is easier if you have slightly thinner hair than mine!). This is actually the trickiest part for me, and as you can probably see below I have not pinned the bun all that well.
3. Finally voila! Below is a front shot of the hair style, and as you can see it just looks like a normal bun from the front! You can make any changes, mess the style up a bit to make it more casual, or perhaps add some chandelier earrings to dress it up! (Also I changed my top in this picture! I took this just as I was about to leave the house!)
Sorry the pictures are not great, taking pics of the back of your head on your own is very tricky!
I hope you try the hairstyle out!
Thursday, 3 May 2012
Lust List
It is revision time again for me, I have had a ridiculous few weeks with 5 pieces of coursework and in just over a week the start of exams (I have 5!). So of course what am I spending my time doing? Procrastinating! And on my most recent trip of idle browsing I found a few dresses, that I am quite frankly in love with!
So there is my little lust list! If only I could afford the beautiful dresses! I had never even heard of Deadly Is The Female until a friend recommended it! It has some beautiful clothes, all with a very vintage feel!
- Printed Belted Dress, £85 at Oasis
- Frenchie Dress, £110 at Deadly Is The Female
- Vera Dress, £75 at Deadly Is The Female
So there is my little lust list! If only I could afford the beautiful dresses! I had never even heard of Deadly Is The Female until a friend recommended it! It has some beautiful clothes, all with a very vintage feel!
Sunday, 29 April 2012
A year ago today
A year ago today, I was having a party, well not really, but the family and I did have a big bbq and I baked a massive cake! It was the Royal wedding, and the weather was beautiful! Which seems very hard to remember at the minute, with, what seems like constant torrential downpour in Leeds.So a year on from the marriage and they seem to have settled in pretty well. Kate especially seems to have taken to being a royal and the wedding has done wonders for the image of the royal family all over the world. So whats next for the happy couple? I'm hoping they start popping out some new, cute little royals, preferably a girl first since the commonwealth leaders agreed on an historic change to give sex equality in
royal succession. In my opinion it was about bloody time!
Below are some pictures of my very British berry cake that I made to celebrate the wedding last year!
| A union jack made out of berries! |
| The epic cake! |
Monday, 23 April 2012
Subscribe to:
Posts (Atom)

.jpg)


.jpg)